


How to Whitewash an Interior Brick Wall and Wood
Posted by Sarah, Celtic Sustainables on 10th Jun 2026
Whitewashing is a simple and effective way to brighten an exposed brick wall while preserving its natural texture and character. The result is a soft, timeless finish that works beautifully in both traditional and contemporary interiors.
To create a whitewashed effect, start by thoroughly cleaning the brick surface to remove any dust, dirt, or loose material. This is an essential step, as a clean surface will ensure the paint adheres evenly.
Next, prepare your chosen breathable paint, such as Earthborn Claypaint, Graphenstone GrafClean, Beeck or Auro Emulsion, by diluting it with clean water. A 50:50 ratio of paint to water is a good starting point, although we always recommend testing the mixture on a small, inconspicuous area first. You can then adjust the ratio to achieve a more opaque or translucent finish, depending on your preference.
Before application, lightly mist the brickwork with water to help the paint absorb evenly. Apply the diluted paint using smooth, even strokes with a brush, then wipe away any excess with a clean cloth to create the classic whitewashed appearance while allowing the texture of the brick to show through.
The key to a successful finish is to work gradually and build up the effect in thin layers. Taking the time to test your mix and prepare the surface properly will reward you with a beautiful, characterful wall that enhances your interior while retaining the charm of the original brickwork.
We Whitewashed Our Showroom Stone Wall
When we purchased Celtic House two years ago, we made a few changes to create a showroom that better reflects the products and systems we recommend every day. One feature that sparked plenty of discussion was the exposed stone wall. While full of character, we felt it could benefit from being brightened up, so we decided to create a beautiful whitewashed finish using breathable mineral paints.
Before painting, we carried out some essential repairs, filling small holes and imperfections with Cornish Lime Fine Surface Filler, a breathable filler that's ideal for traditional masonry and lime-based substrates.
Once the repairs had fully cured, we prepared the wall using two different paint systems. One half was primed with diluted Beeck Fixative before being finished with Beeck Maxil Pro Interior Silicate Paint, while the other half received a single coat of Keim Innostar White.
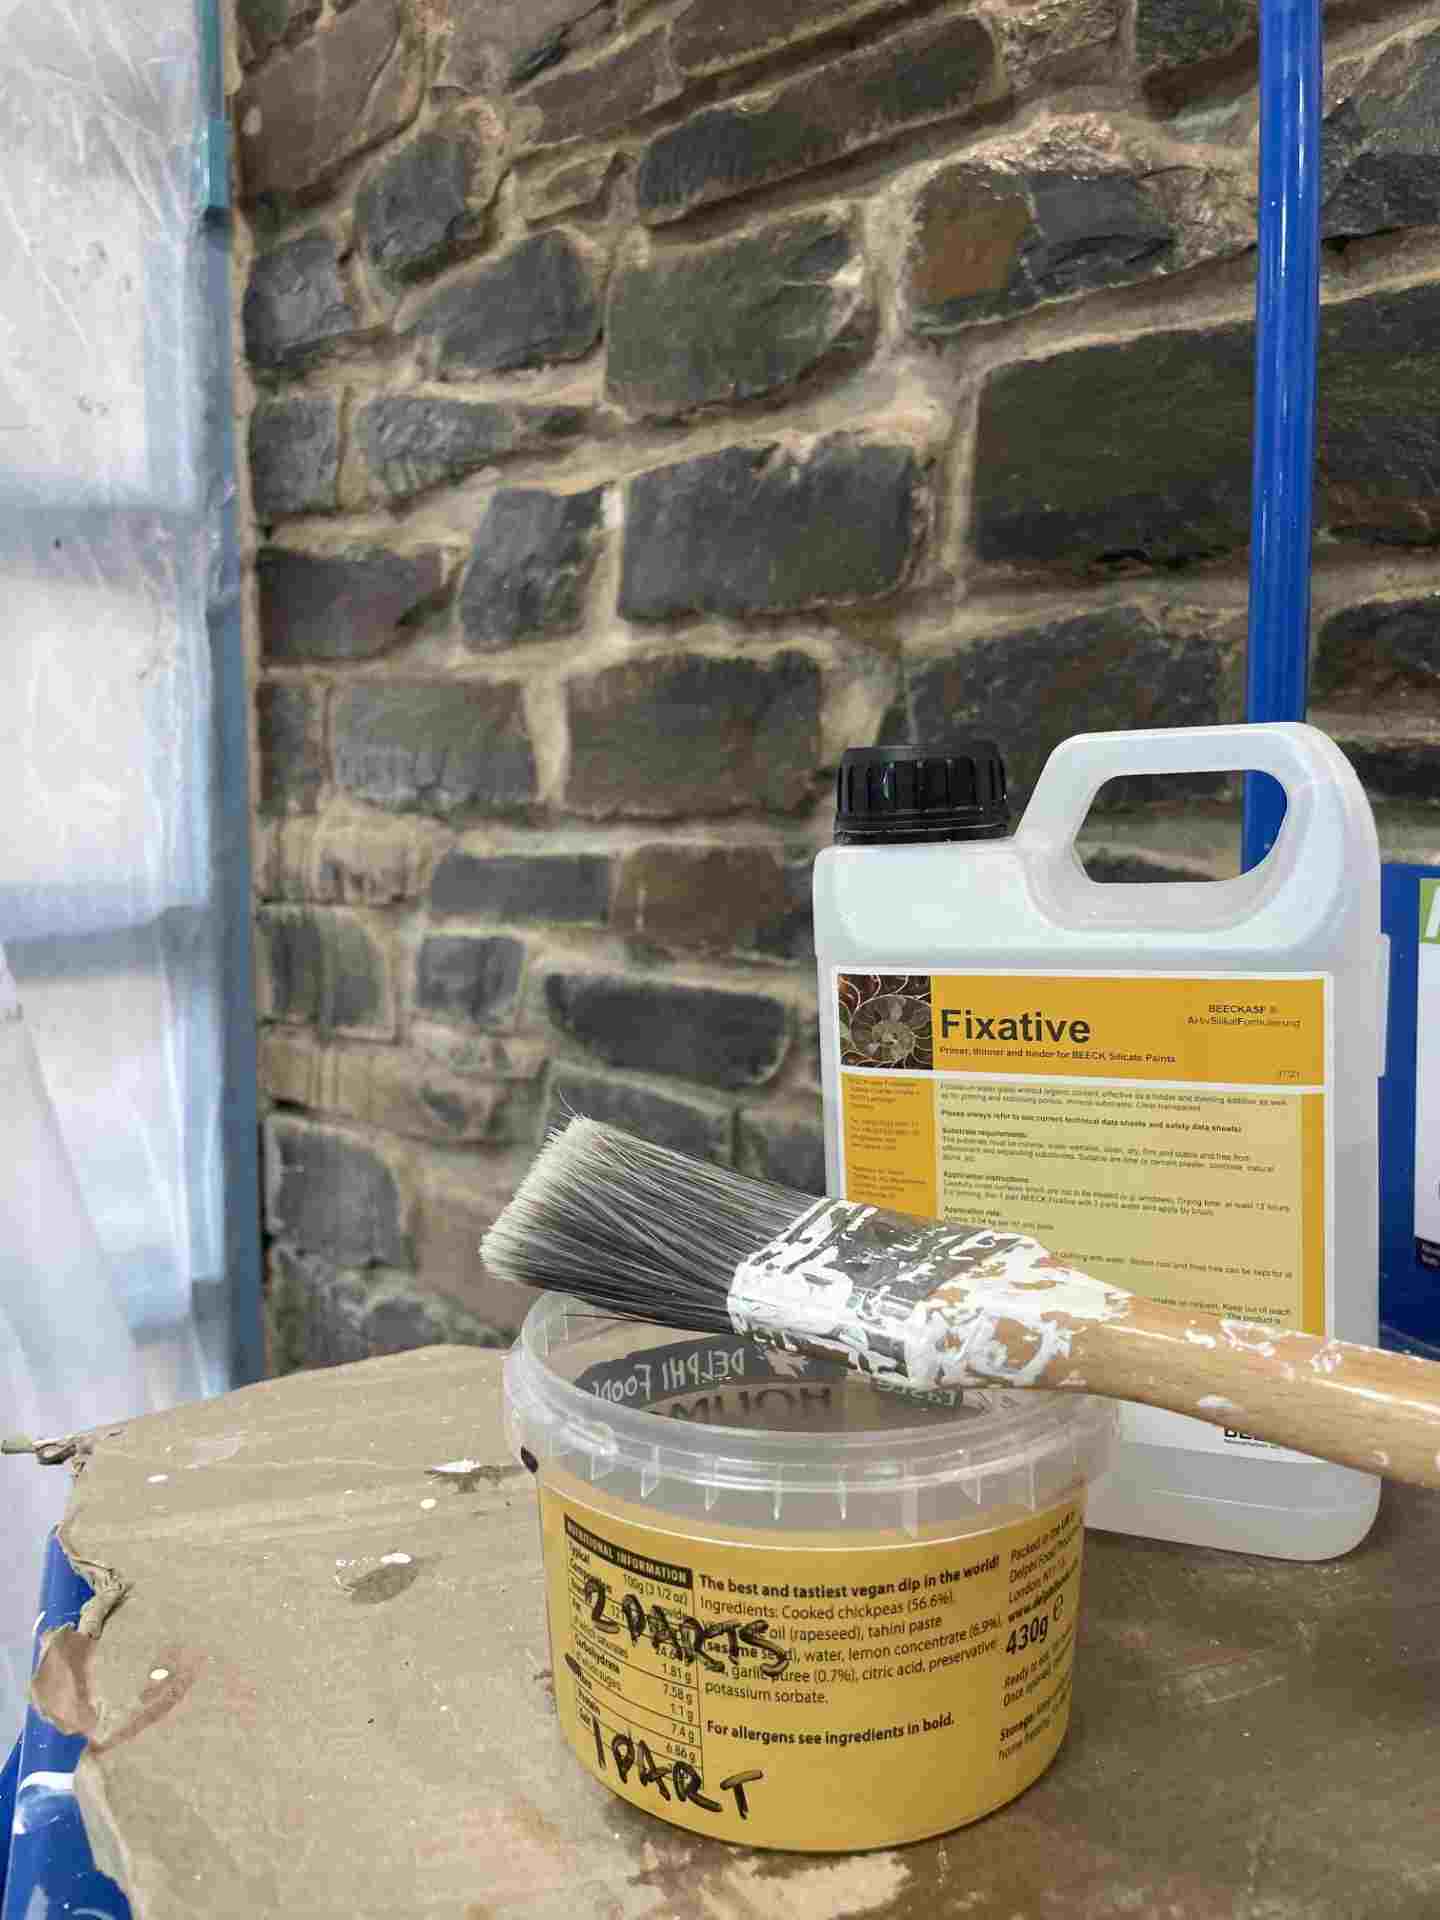
Priming half the wall with Beeck Fixative, ready for the top coat, Beeck Maxil silicate emulsion.
By dividing the wall into two sections, we've been able to compare the appearance, coverage, and finish of two excellent silicate paint systems side by side. It also gives us valuable first-hand experience of applying the products ourselves.

Kem Innostar one coat painted on the right side. Great coverage for just one coat!
There's no better way to recommend a paint than by using it in our own showroom, and the response from customers has been fantastic. Seeing the finishes in person has given many visitors the confidence to choose breathable mineral paints for their own homes, proving just how transformative a simple whitewashed wall can be.
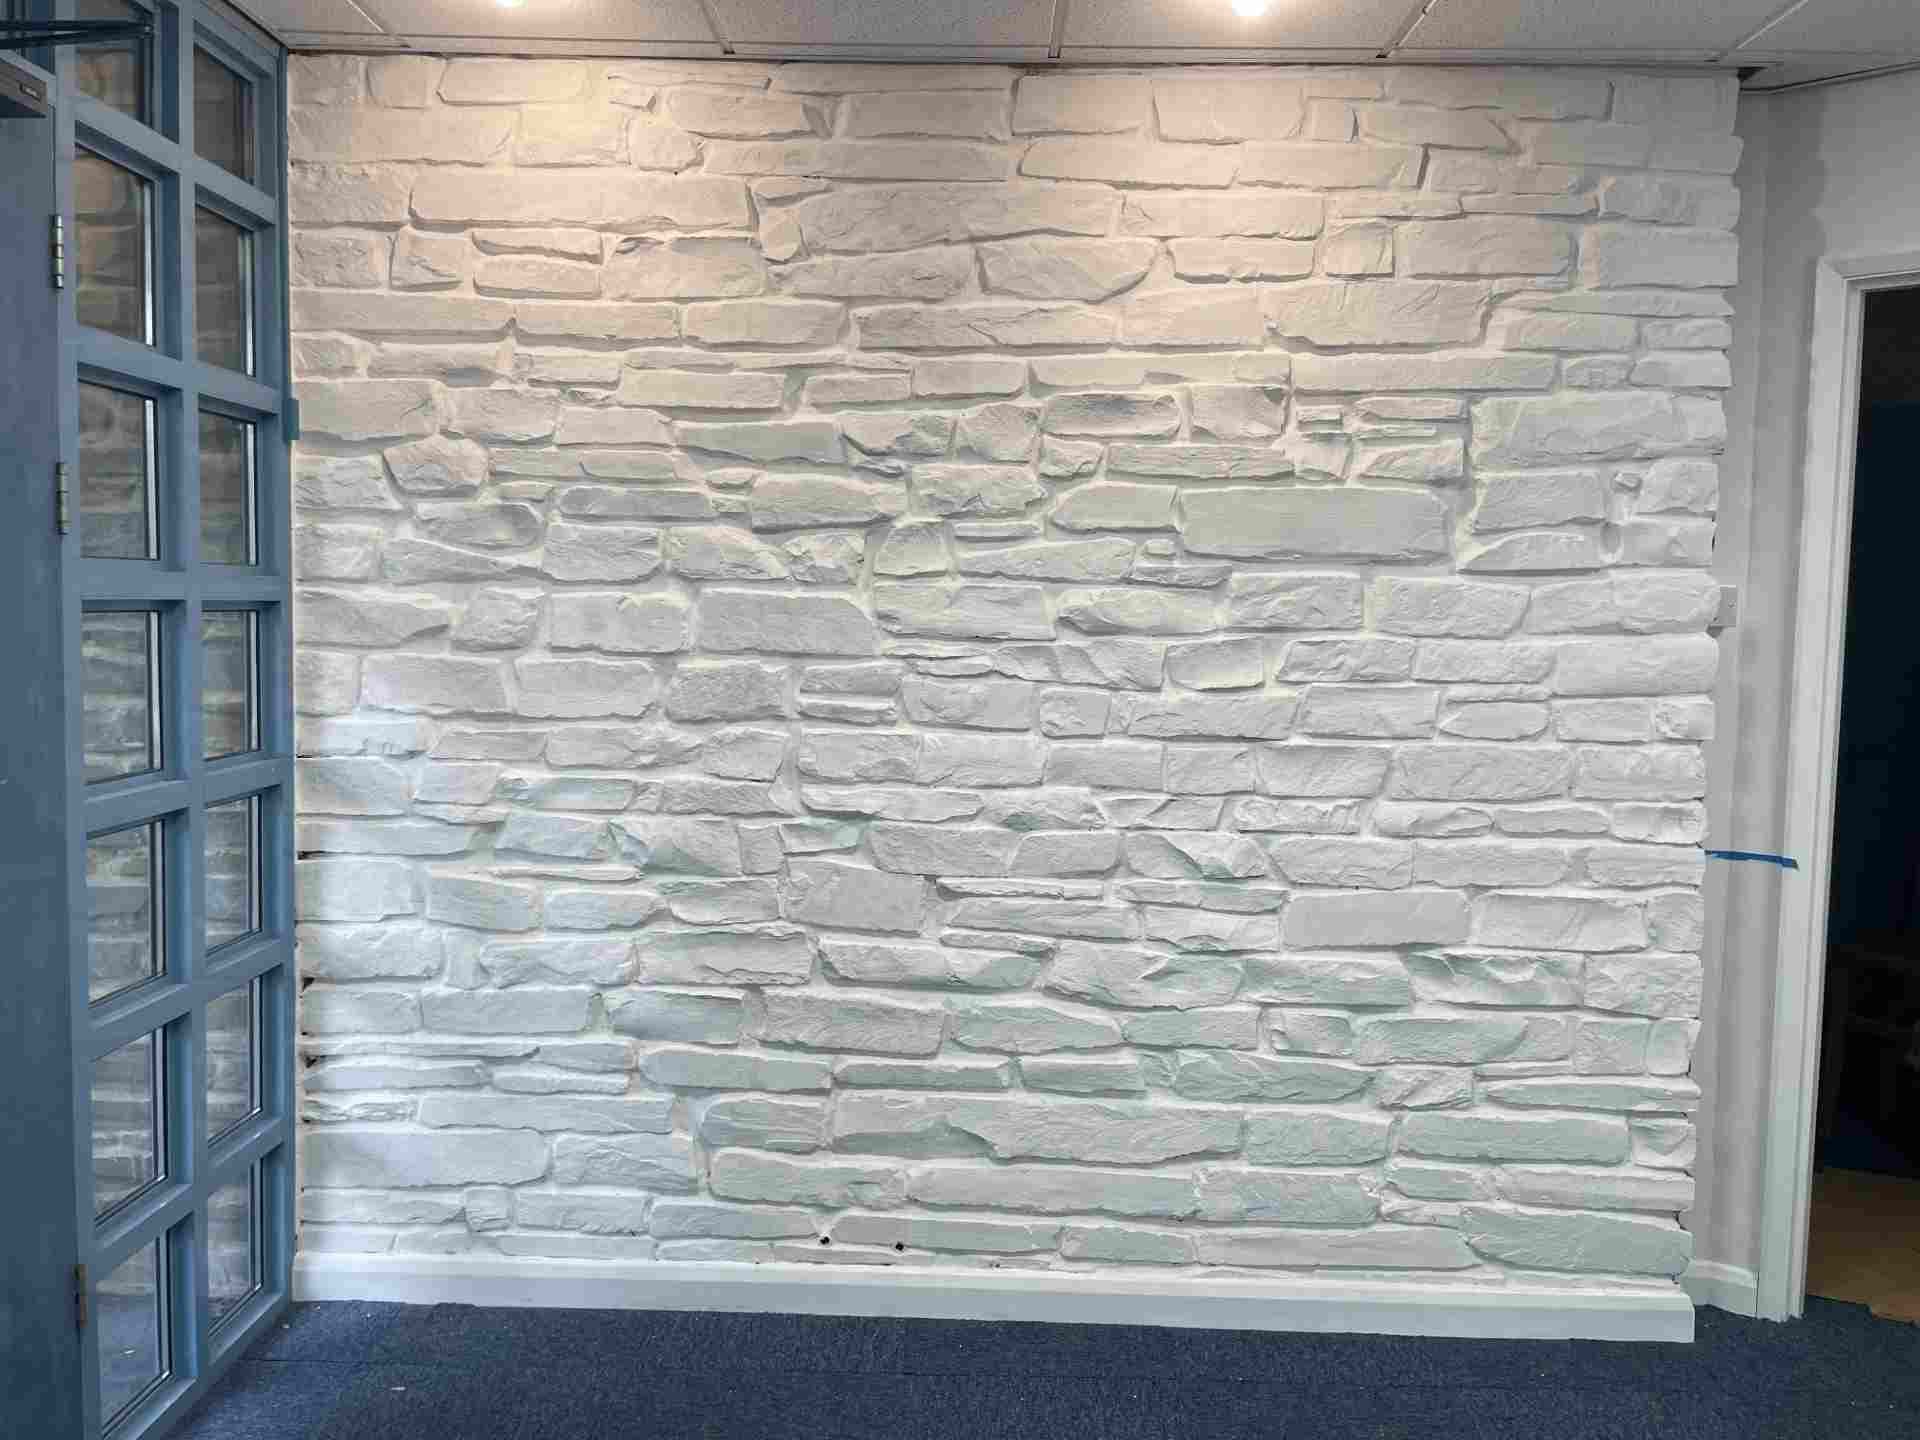
The shop wall complete, with Beeck on the left and Keim on the right.
How to Whitewash Wood with Sustainable Paint
Whitewashing is a simple way to refresh timber while allowing the natural beauty of the wood grain to remain visible. Using a breathable, sustainable paint creates a timeless finish that works equally well in traditional cottages and contemporary interiors.
Creating a Bleached Wood Effect with Graphenstone Eggshell in Our Celtic Showroom!
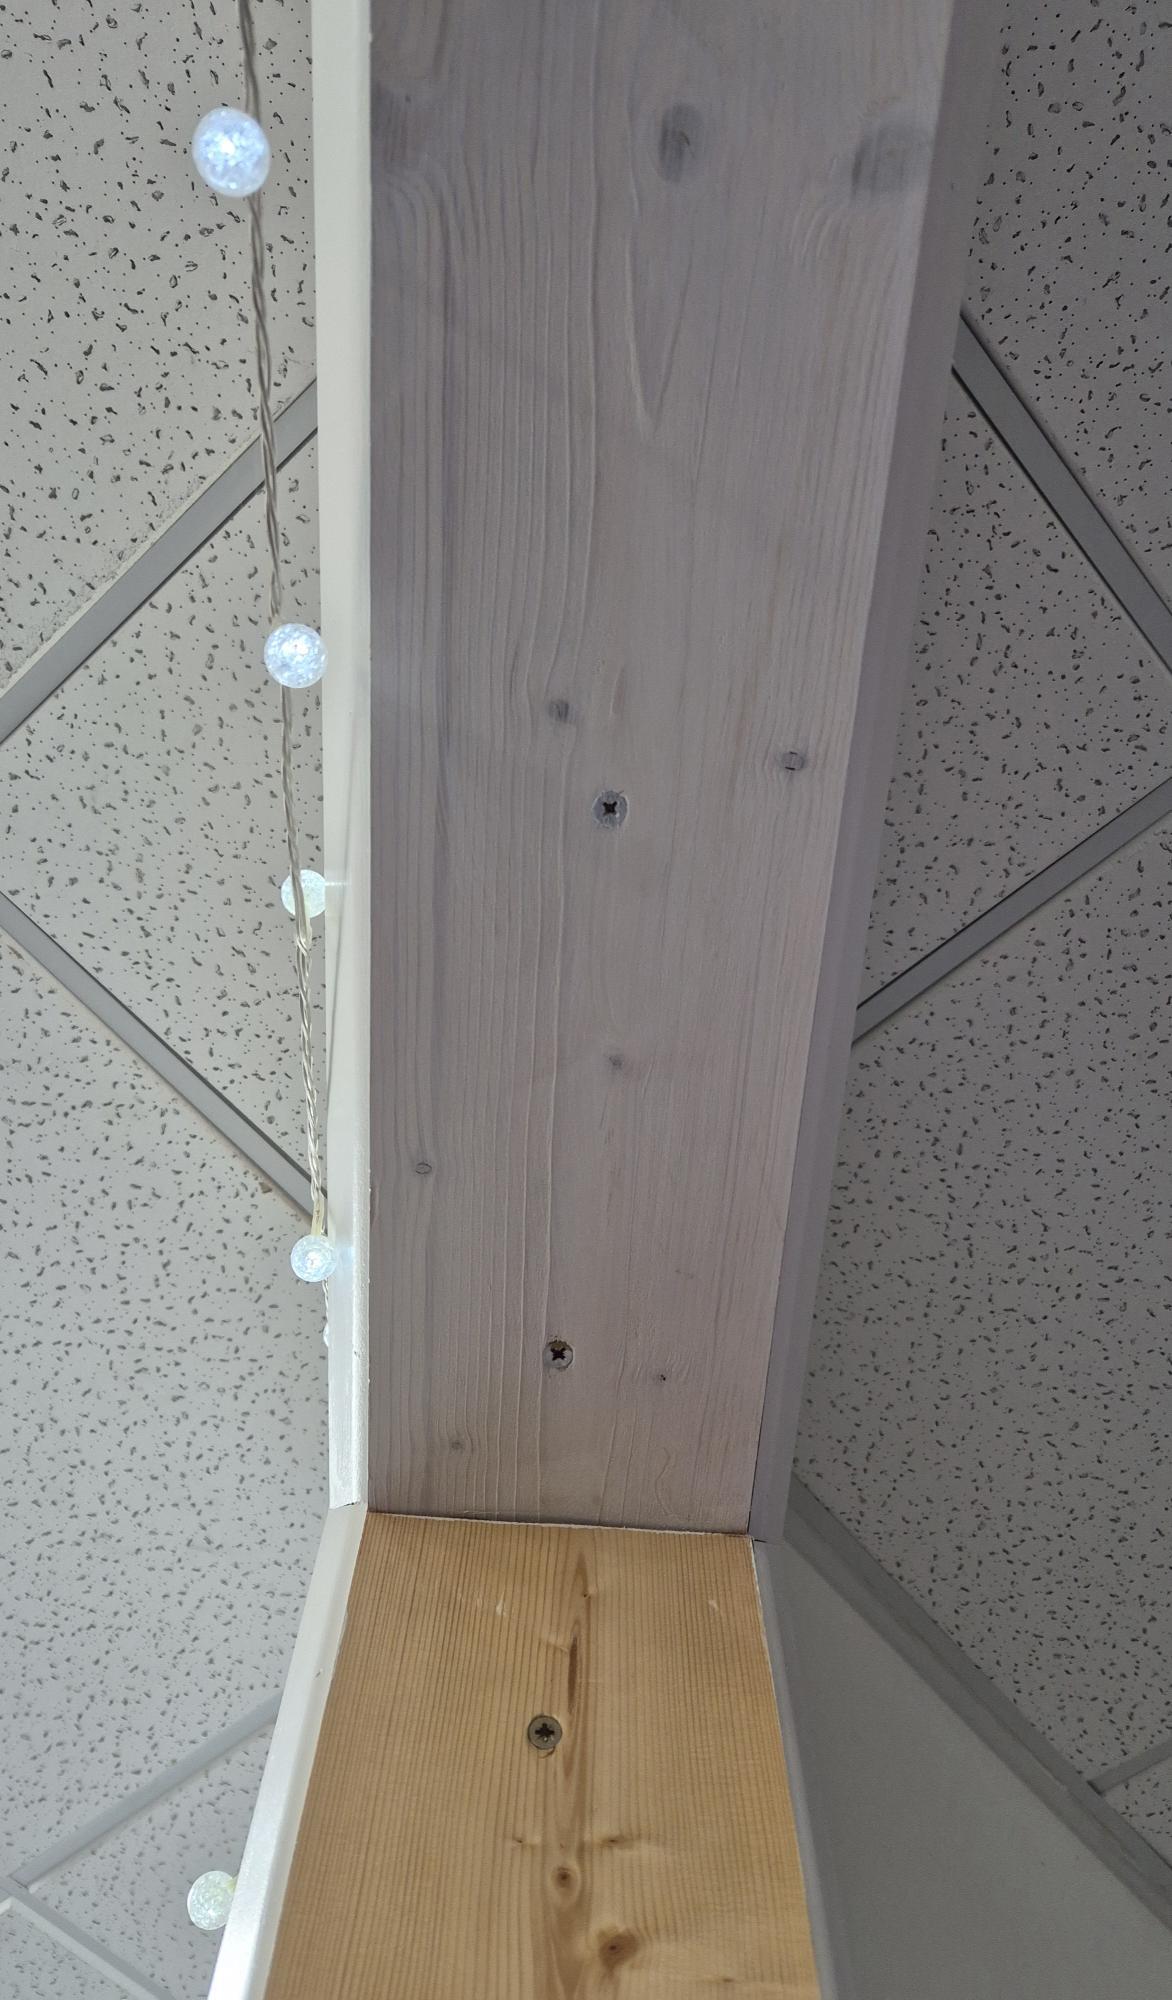
As we transformed our Celtic Sustainables showroom, we wanted to showcase not only different paint colours but also the variety of finishes that can be achieved with a little creativity.
One feature we're particularly pleased with is the bleached wood effect on the timber arch trims that divide the showroom. Rather than applying a full-strength coating, we diluted Graphenstone GrafClean Eggshell and applied a single coat, allowing the natural grain of the wood to remain visible while creating a soft, lightwashed finish.
The result is a subtle Scandinavian-inspired look that brightens the timber without hiding its natural character. It's proved to be a popular talking point in the showroom and has inspired many customers to recreate the effect in their own homes.
The finish can be difficult to capture in photographs, especially with the showroom lighting directly above, but in person it beautifully demonstrates how versatile the eggshell paints can be.
If you'd like to achieve a similar look, try diluting your chosen eggshell paint and testing it on an offcut or inconspicuous area first. By adjusting the dilution, you can create anything from a gentle whitewashed finish to a more pronounced bleached timber effect, tailored perfectly to your project.
What You'll Need For Whitewashing Brick Walls & Timber
- Your chosen sustainable white paint
- Clean water for dilution
- A good-quality wide paintbrush
- Lint-free cloths or rags for wiping away excess paint
- Protective sheeting or cardboard to cover floors and surrounding areas
Step-by-Step Guide for Achieving Whitewashed Wood
- Prepare the timber
For the best results, the wood should be clean, dry, and free from existing varnishes, stains, or sealers. Sand the surface back to bare timber and remove any dust before you begin. - Mix your whitewash
Start with a 1:1 or 2:1 ratio of water to paint. A thinner mixture will create a more translucent finish, allowing more of the wood grain to show through. We always recommend testing your mix on a small area first. - Apply the wash
Brush the diluted paint onto the timber, working with the direction of the grain. While the paint is still wet, gently wipe away the excess using a lint-free cloth to achieve a soft, natural whitewashed effect. - Build the finish
Allow the first coat to dry completely before deciding whether to apply additional layers. Multiple thin coats will create a brighter, more opaque finish while still retaining the character of the timber.
Need Advice?
Every project is different, whether you're whitewashing timber, exposed brick or plaster. If you're unsure which product or finish is right for your home, get in touch with the team at Celtic Sustainables. We'd love to hear about your project and help you achieve the perfect look, whether you're after a subtle washed finish or a bold rustic statement.