How to create a limewash effect on interior walls
Posted by Celtic Sustainables on 19th Feb 2024
The limewash effect on interior walls is very much in vogue. With architects like Will Foster in the BBC home makeover series “Your Home Made Perfect” (Series 4, Episode 5) recommending limewash on kitchen walls to softly reflect the light with muted chalky matt tones, it’s hardly surprising that limewash is seeing a bit of a revival.

In the Your Home Made Perfect program we see Will and presenter Angela Stanton creating a limewashed panel each at the Joanne Paulton Studio and Paintschool in London. Will chose a green pigment to mix with his lime putty and water. Angela opted for more “coffee” coloured tones by mixing dark and lighter pigments into her limewash mix. After applying it in wonky and rough painting patterns, Will quickened up the drying process by using a hairdryer on the panels to show how the paint “softens” as it dries. We don't recommend you use a hairdryer on your limewashed walls!
Traditional limewash is simply equal measures of lime putty with water, whisked to a creamy consistency to which you add your chosen lime stable pigment(s).
Simple eh? Well, it depends on what you are painting Limewash onto.
The main thing about traditional limewash, when choosing it as a decorative wall finish, is that it has to be painted onto porous or mineral surface, i.e. a wall that has already been painted with limewash or has been lime rendered or is plain stone or brick etc.
Traditional limewash works by being absorbed into the surface (it also needs multiple thin coats to achieve a depth of colour).
Modern paints, including most standard emulsion paints and primers, create a barrier on the painted surface which make it impossible for the limewash to stick or be absorbed into the wall. It will simply rub off.
However, there is a way to create a limewash effect, including the soft chalky tones, if you are painting over previously painted walls.
How to limewash over previously painted walls, ceilings and bare plaster
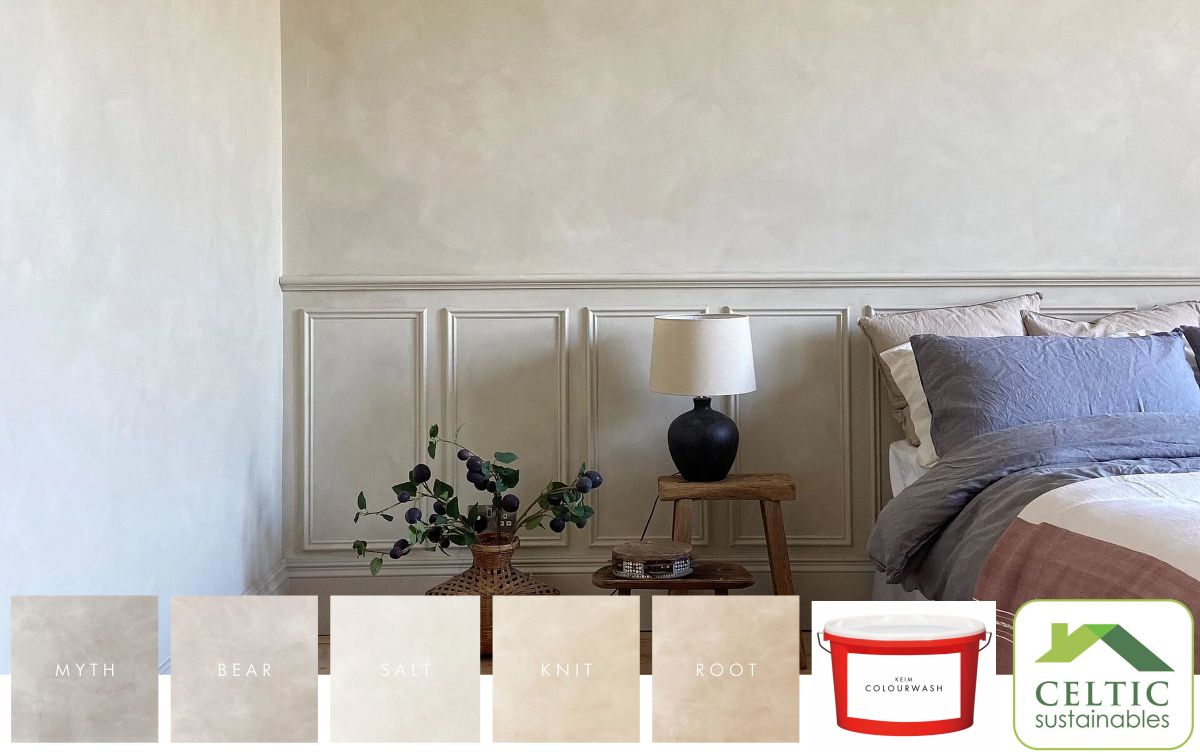
Keim Colourwash is simply the easiest way to create the limewash look. Unlike traditional limewash, KEIM Colourwash creates the perfect finish in just a single coat, does not require diluting, is non-caustic and forms a permanent bond to a painted surface.
There are two steps.
First paint the wall with Keim Colourwash Base. The Base is an opaque white paint that acts as a bridge between the previously painted wall and the Keim Colourwash limewash effect paint.

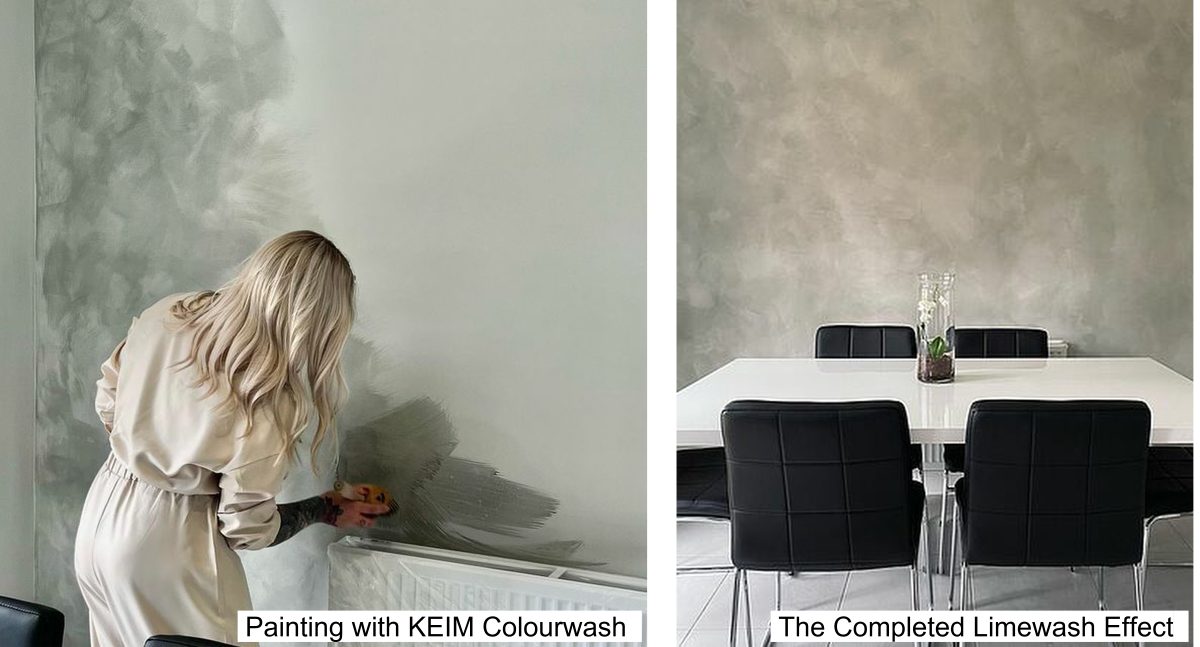
Second (see photo above), after allowing at least 12 hours for the Base coat to dry, paint the wall with Keim Colourwash (a ready-mixed translucent paint) with a thick oval brush.The colour "Myth" which gives a concrete look is demonstrated in the above photos. Paint the wall in the same wonky and rough patterns that Will and Angela did in the programme – very much as though you are conducting a symphony! If you didn’t see the programme, aim for overlapping and sweeping “M”, “S” and “W” shapes with your brush. Don’t worrying about uniformity. Blend drips though where required . Maintain a wet edge and work to a natural break line like a corner of the room.
If you want to create the physical texture of a lime rendered wall too (which tends to be a little more textured than modern smooth plastered walls), you could go for an optional initial step of painting the wall with Keim Colourwash Textured Undercoat. Do this optional step before the Keim Colourwash Base coat.
Very much #likelimewashbutbetter !


